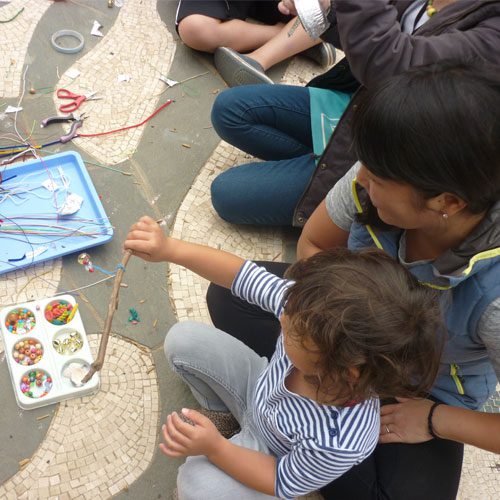
Children explore the science of sound as they use natural and recycled materials to make their own wind chime! This activity practices making decisions and thinking flexibly about materials.
Materials Required
- Beads
- Shells
- Dried colorful pasta
- Bells
- Washers
- Screws
- Nuts and bolts
- Yarn
- Pipe cleaners
- Colorful wire
- Sticks/small branches
- Foil
- Tape
- Scissors
Instructions
- Children will use various materials such as wooden beads, shells, dried colorful pasta, bells, washers, and other materials to construct their own wind chimes. Yarn, pipe cleaners and wire will hold these pieces together. Allow children to experiment with different methods of fastening and combining.
- Sort the first five materials using a muffin tin or other divided container.
- Invite each child to choose a stick or small branch as the base of their wind chimes.
- After initial exploration of the materials, invite children to plan a design on paper by drawing their ideas. Support them in thinking about how they would like their wind chime to look and sound.
- Next, children should build their wind chimes. Give a design challenge related to a specific sound. Choose from one of the following or create your own:
- Create a wind chime that will sound an alarm or warning signal.
- Create a wind chime with a sound that will soothe and relax.
- Create a wind chime that sounds like the ocean waves.
- Create a wind chime with pitches that are only in a low, deep register.
- Design a wind chime with someone else’s preferences in mind. What sounds would they like to hear? What would they want it to look like?
- After building, children can test their wind chimes in the wind or with a fan to observe the sounds made by different materials and combinations of materials.
- Finally, encourage children to revise their wind chimes, reflecting upon their initial design and asking, does your wind chime look and sound like you expected? What could you change to make the look and/or sound more similar to your plan? Does it meet your initial design challenge (to soothe and relax, sound an alarm, etc.)?
Additional Tips
Try these add-on activities:
- Ages 2-5: Use larger materials like shells and dried pasta. Provide lots of time for experimenting with materials and provide assistance as needed to attach materials. No design challenge is needed for this age group.
- Ages 6-9: Use smaller materials like screws and beads. Emphasize children’s time to create an initial plan and invite them to reflect on whether or not their design met their own expectations or how it differed from their initial plan. Introduce design challenges.
- Ages 10-14: Provide materials that can be cut or manipulated like foil. Give a specific design challenge and focus reflection on whether or not their wind chime met the design challenge. Provide plenty of reflection time and time to revise their designs to make it better or closer to meeting their design challenge.
- Ages 14+: Let them pick their own design challenge! Consider introducing electronic elements.
Links to Research
This activity encourages us to reuse and upcycle objects around the house, providing another example of how we don’t need to buy things in order to create. Re-imagining how we use things is not just a way to save money; challenging everyday uses of objects is an effective way to encourage creativity by discouraging what Karl Duncker (1945) called “functional fixedness.” For example, toilet paper rolls can be reused for many things, and do not need to be sent immediately to the recycling bin. In fact, there is some strong research suggesting that overcoming functional fixedness is a key skill for innovators (McCaffrey, 2012), and can indeed be taught and encouraged (German & Defeyter, 2000).
Supporting research includes:
Duncker, K. (1945). On problem solving. Psychological Monographs, 58(5, Whole No. 270).
German, T. P., & Defeyter, M. A. (2000). Immunity to functional fixedness in young children. Psychonomic Bulletin & Review, 7(4), 707-712.
McCaffrey, T. (2012). Innovation relies on the obscure: A key to overcoming the classic problem of functional fixedness. Psychological Science, 23(3), 215-218.


